Monday, December 2, 2013

ShesSoWitte Jewelry Christmas Open House Holiday Jewelry Display

Holiday decorating is complete in the Queen Bee Boutique of ShesSoWitte Jewelry Salon.  I'm pleased (and slightly aghast) to share that the only purchase I made for this endeavor was 3 strands of lights.  The rest came from my eclectic hoard.  I knew this stuff would come in handy some day!!


The large mirror makes it easy for customers to check out their look when trying on pieces. I also makes the room appear larger and adds nice reflected light from the one wall with no windows. I love my jersey dress forms for displaying necklaces and bracelets.  The bracelets are held in place with a single long quilting pin, so it's easy for customers to try them on without feeling like they're disturbing the display. 


An assortment of local wines and a wee snack while shopping makes customers feel at home.  Hubby's homemade wine is usually the star of that show!!

  Varying the height of the displays creates visual interest and draws the attention to groups of items.  Just below the charm holders are dishes of wire wrapped charms, sorted by color.  Customers LOVE digging through things in bowls or in small trays.  It invites them to "play".
 An antique hand painted pin dish holds dozens of sterling silver stacking rings invarious sizes.  Another example of the type of display that lets customers really get their hands on the merchandise and encourages them to play.  The items used for display aren't holiday specific, but with a sprig of greenery and some "sugared" plastic fruit or pine cones, they magically transform into displays with a decidedly Christmas feel. 


I tend to sort things by color, and create my displays accordingly.  It's always surprising to me that pieces I've created separately - sometimes months apart - end up coordinating well together. 


Holiday gift bags and coordinating tissue are inexpensive display props that can be easily stored and reused from year to year.
 One nice piece of linen sets the stage for everything above.  And it doesn't really matter if there's a spot or a small hole because your displays will cover most of it!
 I purposely left my tree a bit on the bare side, since I wanted to draw the attention to my jewelry instead.  I like the Charlie Brown feeling it gives.  I use the space under the tree to stash filled orders for pickup. 

The Traveler Necklace

"Wherever I Go, There I Am"
The Traveler Necklace

A working antique compass with brass case and original beveled glass is the focal point of this piece. From the base of the compass I've hung an antique frosted glass perfume stopper in my own handmade copper bezel. On the antiqued brass chain is an antique barrel skeleton key, a vintage African brass bead with verdigris age patina, and a vintage copper Grotta Azzura (Blue Grotto) Capri souvenir bell charm. I used oxidized steel to create the beaded stations of the chain, and the beads are amazonite, yellow agate, carved horn, and ceramic.


Double S-hook clasps allow you to wear this 34" necklace as a choker by hooking the clasps into the bail of the compass. Focal drops an additional 5" from the chain and measures 1 5/8" at its widest point.

SOLD
 

Keeper of the Queen's Chocolate


If I were Queen, I'd hoard the finest chocolates in the world, and treat them like the most precious of my jewels. There would be a special room - nay, an entire wing - in my castle, dedicated to housing my precious morsels. I'd appoint a Keeper of the Queen's Chocolate to safeguard my treasure from marauding bands of chocolate thieves, and the key to the keep would be a jewel in its own right.

Design details:
A handmade reliquary style open bezel mounting of copper and bronze showcases a vintage rhinestone key brooch with an embossed copper background. Vintage brass stampings frame the focal at the top and bottom, with a faceted genuine topaz and rhinestone dangling from the bottom. Alternating antique gold-filled 1/4" textured flat cable chain and 5/8" wide hammered sterling silver links are the foundation of the neck chain, as well as stations of sterling silver wire wrapped chocolate pearls and another faceted genuine topaz surrounded by vintage rhinestone spacers.

Hand forged sterling silver hook and eye clasp features a single chocolate pearl with vintage rhinestone spacer, dangling from a short gold filled chain. The necklace can be worn shorter by hooking the clasp into any of the links along the chain, and the loose end adds a lovely asymmetrical element when the piece is worn as a choker. Maximum wearable length of 28", the focal dropping an additional 4 1/2".

Available in my Etsy shop here.

Friday, September 27, 2013

Cherry Blossom Flour Sack Inspired Necklace

 So much of what I do feels like playing. Sometimes I like to pull together a pile of related elements and "see what happens".  This necklace is the product of just such an exercise. 
I experimented with using embossing powders on a stamped image on glass which worked pretty great I have to say. I used a small rubber stamp of a Japanese lantern to place the design, then sprinkled gold embossing powder on the glass tile.  I set it on a candle warmer for a few minutes and it melted into place.  It needed something behind the embossing to make the image pop, so I dug out this old flour sack material from my long neglected quilting supplies.  The effect is charming and feminine, and I love the almost garish colors, softened by the silver and age-patinaed phosphor bronze in the handmade chain and wrapped accents. 
If you've never worked with phosphor bronze, I recommend giving it a try.  It has a softer color than copper, a bit like rose gold and it gets a great "old gold" look to it when it oxidizes a bit. (available from Wickwire Jewelry).


Here's the inspiration photo of the materials I started with:

The piece of "carved coral" glass is vintage Cherry Brand pressed glass from Occupied Japan, and I think it works much better than the dangle I have on the piece.  The piece changed so many times in the process of creating it, that somehow I left this bit out.  Definitely needs to be swapped out and photos redone.

Alright then, off to change it out and redo the photos. 

Thursday, September 19, 2013

The Saving of the "Very Good Signs"

So we've had a guy here this week doing some earth moving around the farm - cleaning off the creek, cleaning out a branch that runs into the creek, etc. Last night hubby tells me that he's also covering up part of the garden as part of his attempt to reduce his compulsive overworking in the summer, which sounded great to me. Last night, that is. This morning I realized that he meant the garden patch which contains my "very good signs". Whaaa?????

I ran outside with a bucket, a rake, a hand trowel in.the.rain. and started picking up everything I could find. I'm proud to say I didn't throw a hissy fit . . .but I was prepared to lay down on the spot in protest and dare them to bulldoze over me!! Thankfully, hubby was open to a compromise and had the guy scoop up 7 or 8 huge scoops full of dirt from that area into piles at the edge of the woods for me to sort through.

The things we do for our art, eh?
I think it was completely worth it:

Friday, May 3, 2013

Rainy Day Inspiration

"The world's favorite season is the spring.
All things seem possible in May."
-  Edwin Way Teale

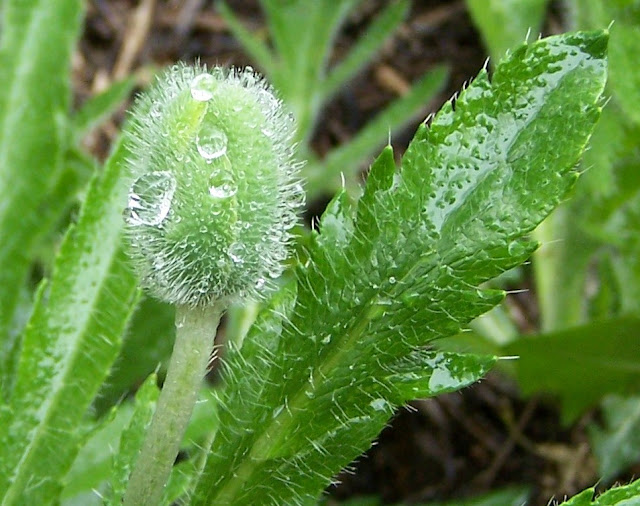
To me there is nothing more miraculous than watching my perennial beds transform from a barren landscape to the bountiful glory of flowers every Spring. The rain was an especially gentle one, creating lovely drops of inspiration.


Friday, March 29, 2013

ShesSoWitte Jewelry Studio Project

It's official! I converted my garage into a studio workshop, and I am in love. I honestly think I would sleep in there if I could.  (. . . Yes . . . I tried it, but the loveseat is too small.)

 
There are lots of cabinets and drawers and containers to hold all my bits and pieces, and several design surfaces with good lighting.


I even have a shipping department.  It's quite an upgrade from the breakfast bar in the kitchen!


My bench, custom made by Adam Hempelmann of Hempelmann Construction


    Let the creative process RESUME!!

Sunday, March 3, 2013

Wearable Length: How to Measure for a Bracelet

Being a 5'9" plus sized woman most of my adult life, I've had my share of frustrations trying to find bracelets that fit.  Every bracelet seems to be 7" long.  That's great for some styles, but others won't even go around my wrist - and it's now just 6 1/2" in circumference.  It defies logic that a 7" bracelet won't fit a 6 1/2" wrist.  Or does it?? 


I generally use my own wrist as a guide when creating (6 1/2") which serves two functions: I get to see how much longer I need to make the bracelet, and I get to try them on to see how gorgeous they look (or not, but that's a whole other blog *hehe*)  I customize everything to fit my clients, most of whom are out of state or even out of the country, so I need to get it right the first time when measuring the finished product.  So I always ask for the actual wrist circumference.

You can get a measurement of your wrist by using a soft measuring tape or by measuring the inside of your your best fitting watch. If you don't have a soft measuring tape, you can wrap a ribbon or a piece of string around your wrist at the wrist bone, mark the spot where it meets, and then measure it with a ruler to determine your wrist size. To get the best fit, measure snug at the wrist bone.  Your bracelet size is your wrist circumference plus 1/2 to 1 inch, depending on how snug you like to wear your bracelet.  

When creating a bracelet, I always ask for the client's wrist circumference.  I use a bracelet mandrel that has graduated sizes from 4" to 9" in circumference.  Once I know the client's actual wrist measurement, I measure it against the mandrel and adjust accordingly.  Why?  Depending on how the bracelet is made, it could be 3 inches longer than the person's wrist and still fit perfectly!!

Here's a perfect example.  The bracelet in the photo above is 9" long.  If someone said, I have an 8" wrist, you'd think that this bracelet would fit, right?  Not so!  The 9" bracelet in the photo fits loosely on the 5 3/4" wrist of the hand model.  How can that be?  The links are 3/4" thick which makes the wearable length much shorter than the measurement of the bracelet.  I'm sure there's a mathematical formula for calculating this, but I don't know it.  

So the next time you order a custom made bracelet online, be sure to tell the artist your actual wrist circumference so she can create the perfect fit for you!!


Thursday, February 28, 2013

The Jelly Queen of Gasconade County

Missouri wild plum jelly, made by the Gasconade County Fair Jam & Jelly Queen *heehee*
Once upon a time, there was a City Girl who fell in love with a Country Boy.  She longed to please him and acquire his Country skills, so she learned how to hunt, fish, garden, and make jelly.  Of all the City-Turned-Country Girl's skills, jelly making was the one that pleased the Country Boy the most.  He encouraged her to enter her jelly in the County Fair, and lo and behold . . . she won the giant purple ribbon!  The Ball Award/Best of Show in Soft Spreads.  It became an inside joke between the Country Boy and his City Girl ("Ball Award Soft Spread Queen") but when he bragged to his friends, he called her The Jelly Queen of Gasconade County. This made the City Girl smile, for she knew her Country Boy was proud of her Country skills.

One day, the City Girl started a jewelry business. Soon the jars of delicious homemade jellies that once lined the shelves of the Country Boy's pantry disappeared until there was nothing but an empty space.  The Country Boy pleaded with the City Girl to work up the wild plums in the freezer and the gallons of tart pie cherry juice in the pantry and turn them into jelly.

One day the City Girl decided that she would surprise the Country Boy and spend the day making jelly.  The Country Boy was so happy, that he took jars of the sparkling jelly to share with his friends at their weekly Country Boy Shed Party/Washer Tournament.  He bragged and bragged about his City-Turned-Country Girl Wife, and they lived happily ever after.


*giggle*

Here's my jelly making day in pictures . . . . Enjoy!!
Everything you need to make the perfect jelly, right here: juice, sugar, pectin, big ole dancing jelly pan, long wooden stirring spoon, wire whisk, spatula, big ole measuring cups, hot pads, dark towels (juice stains!) and jars.
Missouri wild plums. Cover with water, bring to a boil until the skins start to split.  Foaming is normal - they're loaded with pectin!
I use an old potato masher to smash them up a bit to release more of the juice and to make the sieving process a bit quicker.
Ladle the hot juice/plums into the sieve and mash to release the juice.  Don't worry about the pits, there will be plenty of good juice without removing them.  I try not to get a lot of the orange-ish pulp in the liquid.  You'll definitely have some unless you use a cheese cloth or a jelly bag, but I like a little pulp. Too much of it ruins the good wild taste - in my opinion.


After all the mashing is finished, I transfer the leftover pulp and pits into my steamer pan. I add 1.5 to 2 cups of water and let it run through the mash again.  I don't squeeze or mash or anything, just let the water run through.  It gets the last bits of juice out of your mash and gives you some extra liquid in case you're short on a full batch.


Isn't it gorgeous!?!  I mix all the juice together to get the pulp distributed evenly, then separate into 5-cup batches.  Jelly is always a 4:6 or 5:7 ratio of juice to sugar so it makes the process run smoother to have batches measured in advance. 


I add the juice to the big ole dancing jelly pan (see the video clip to watch it dance!) and whisk in a package of pectin before it heats up. 

Once it gets near boiling, I start whisking in the sugar a little at a time until it's all added and dissolved.  Then I switch over to stirring with my big ole long handled wooden spoon.

I stir constantly in a rotating figure eight motion the whole time, with the heat on high.  Once the mixture reaches a rolling boil that will not stir down, I start counting.  Two full minutes into this rolling boil I do my first plate test. I also watch for the mixture to turn "glassy" as an indication that it's time to test consistency.

I use the plate test to determine when the jelly is the right consistency.  You want your finished (cooled) jelly to move as a whole unit inside the jar.  Watching the run of the jelly on the plate tells me if I'm at the right stage yet.  I'm looking for it to move very slowly - a creeping run rather than a dripping run. 
Once it reaches the right consistency, I pour the batch into my big ole graniteware pourer.  I bought this piece especially for making jelly and I rarely use it for anything else.  It's the perfect size for a batch of jelly and it's sturdy enough to withstand the heat of the liquid and multiple scrubbing between batches.  Here I'm removing the foam that forms on the top.  I think it's the high pectin that produces the foam.  Anyway it's unattractive, so I remove it.  I don't throw it out though.  I add spices and a little olive oil, rosemary, sage, thyme, garlic and liquid smoke and use it as a glaze for pork - HEAVENLY!


Ready for lids and a hot water bath for 20 minutes, then pop! pop! pop! to make sure they seal.  Once they cool, they'll line the shelves of the pantry once again!!
And here's the dancing jelly pan, doing its happy "I get to make jelly" dance: